This article explains how to create and edit custom payment types for your salon.
In this Article
Adding and Editing Payment Types
Go to Manager > Settings > In the General tab, open Financials > Payment Types.
To add a payment type, click the Add New button.
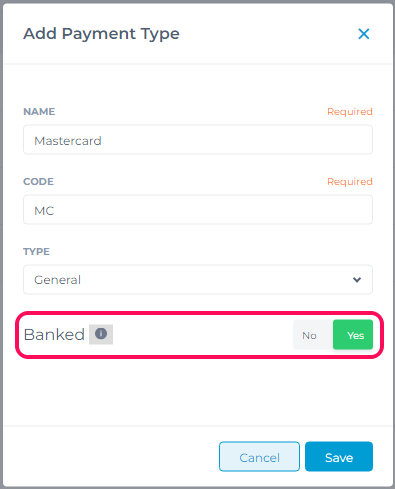
Enter the details of your new payment type in the pop-up window that appears.
The Code field is a shortcode that will appear on your Sales screen and also on some reporting. Set this to letters that can be used to abbreviate your new payment type.
Set the Banked toggle to Yes if this payment type is one that ends up in your bank as revenue. Payments not marked as banked are classed as non-revenue sales.

Click Save.
Your new payment type will now be available on the Purchase screen.
Payment types also appear in Phorest financial reports.
It's best practice to balance the cash at the end of each day and run the Cash Up Report.
Editing a Payment Type
To edit an existing payment type, select its name and make changes in the pop-up window that appears. Click Save.
Restoring/Unarchiving a Payment Type
If you'd like to find a payment type that was previously archived, go to Manager > Settings > Financials > Payment Types, then set the toggle to Archived.
Select the payment type you want to restore.
In the pop-up window that appears, click the Restore button.