These are the steps for installing a Star TSP100 series receipt printer on a Mac computer.
Note: This article is specifically related to the Star TSP100 or TSP143 wired/USB model. If you have the wireless TSP100iii model, click here.
- Click here to download the CUPS drivers for your Mac.
- Open the folder you have downloaded as normal. Go to the following subfolders: Mac > Driver > CUPS driver (Approximate folder name)
- Install the CUPS driver package by double-clicking the file (this file will have a .pkg extension)
- Restart the computer.
- Once back on, connect the printer to the computer using the USB cable.
- Power on the printer
- Click the Apple button -> System Preferences -> Printers and Scanners and confirm you can see the printer.
- Now open Phorest and go to Manager > Settings > Point of Sale > Device.
- Under Receipt Printer Configuration, set the Attached dropdown to Driver, then select the Start TSP100 printer, and click Save.
If you do not see the Star TSP100 as an option, restart your Mac and check again.
- The receipt printer is now configured, and you can print receipts. Set your receipt print preferences under the Purchase Receipt Mode menu
In the event that your printer has an attached cash drawer, but the cash drawer won't open:
- Open your web browser of choice and go to http://localhost:631/printers/
- If there is an error message in your browser, then you will need to enable CUPS support.
- To do this, open a Terminal window (a.k.a Bash Shell). (Run a search for "Terminal" if you can't find it)
- If you cannot find the Terminal, then Press CMD + Space to open Spotlight search, type "Terminal" and hit return.
- Once the terminal is open and running type: "sudo cupsctl WebInterface=yes" (without the quotes) and press Enter.
- This will now enable a web interface to the printer settings. Go back to your browser and type http://localhost:631/printers/ again.
- Select your printer model (StarTSP100 etc.)
- Select from the drop-down menu Set Default Options.
- Select General and ensure the Media Size is set to 72mm * 200mm. Then select Cash Drawer Control, choose Open Drawer 1, and click the Set Default Options button.
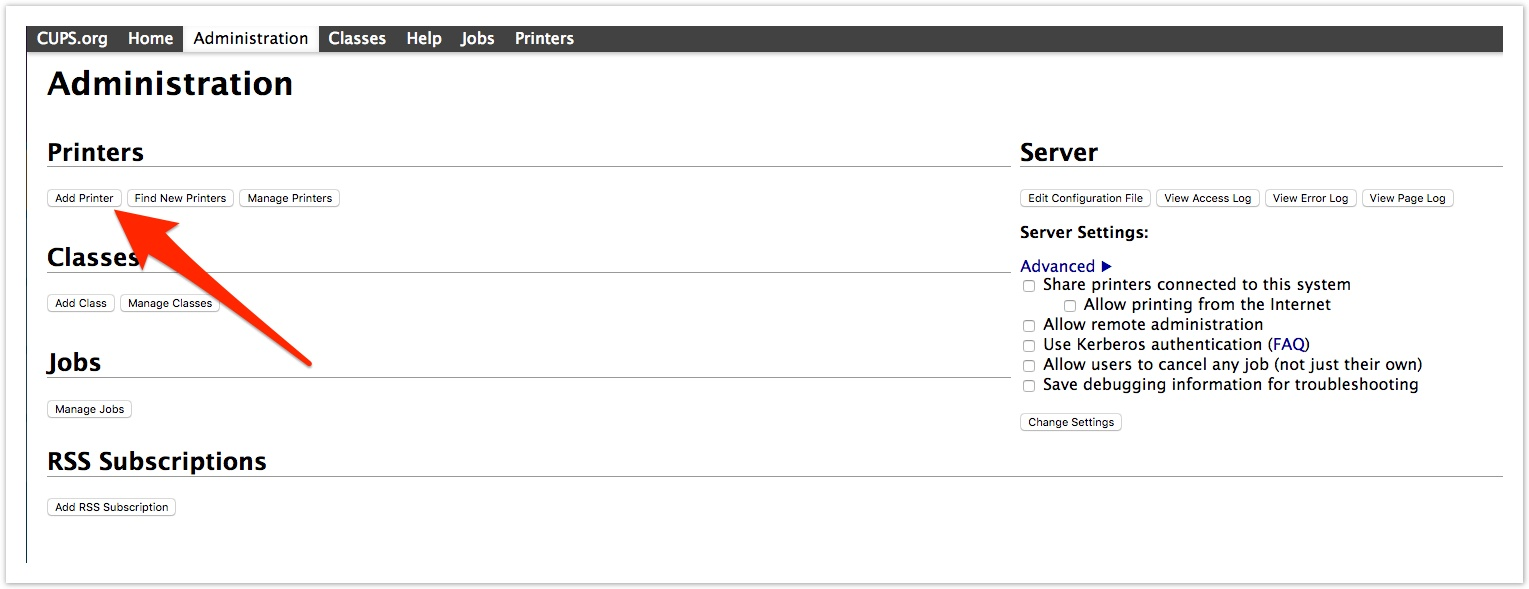
Manually Add The Receipt Printer To The Local Host should it not appear in the normal printer utility:
- Click Add Printer
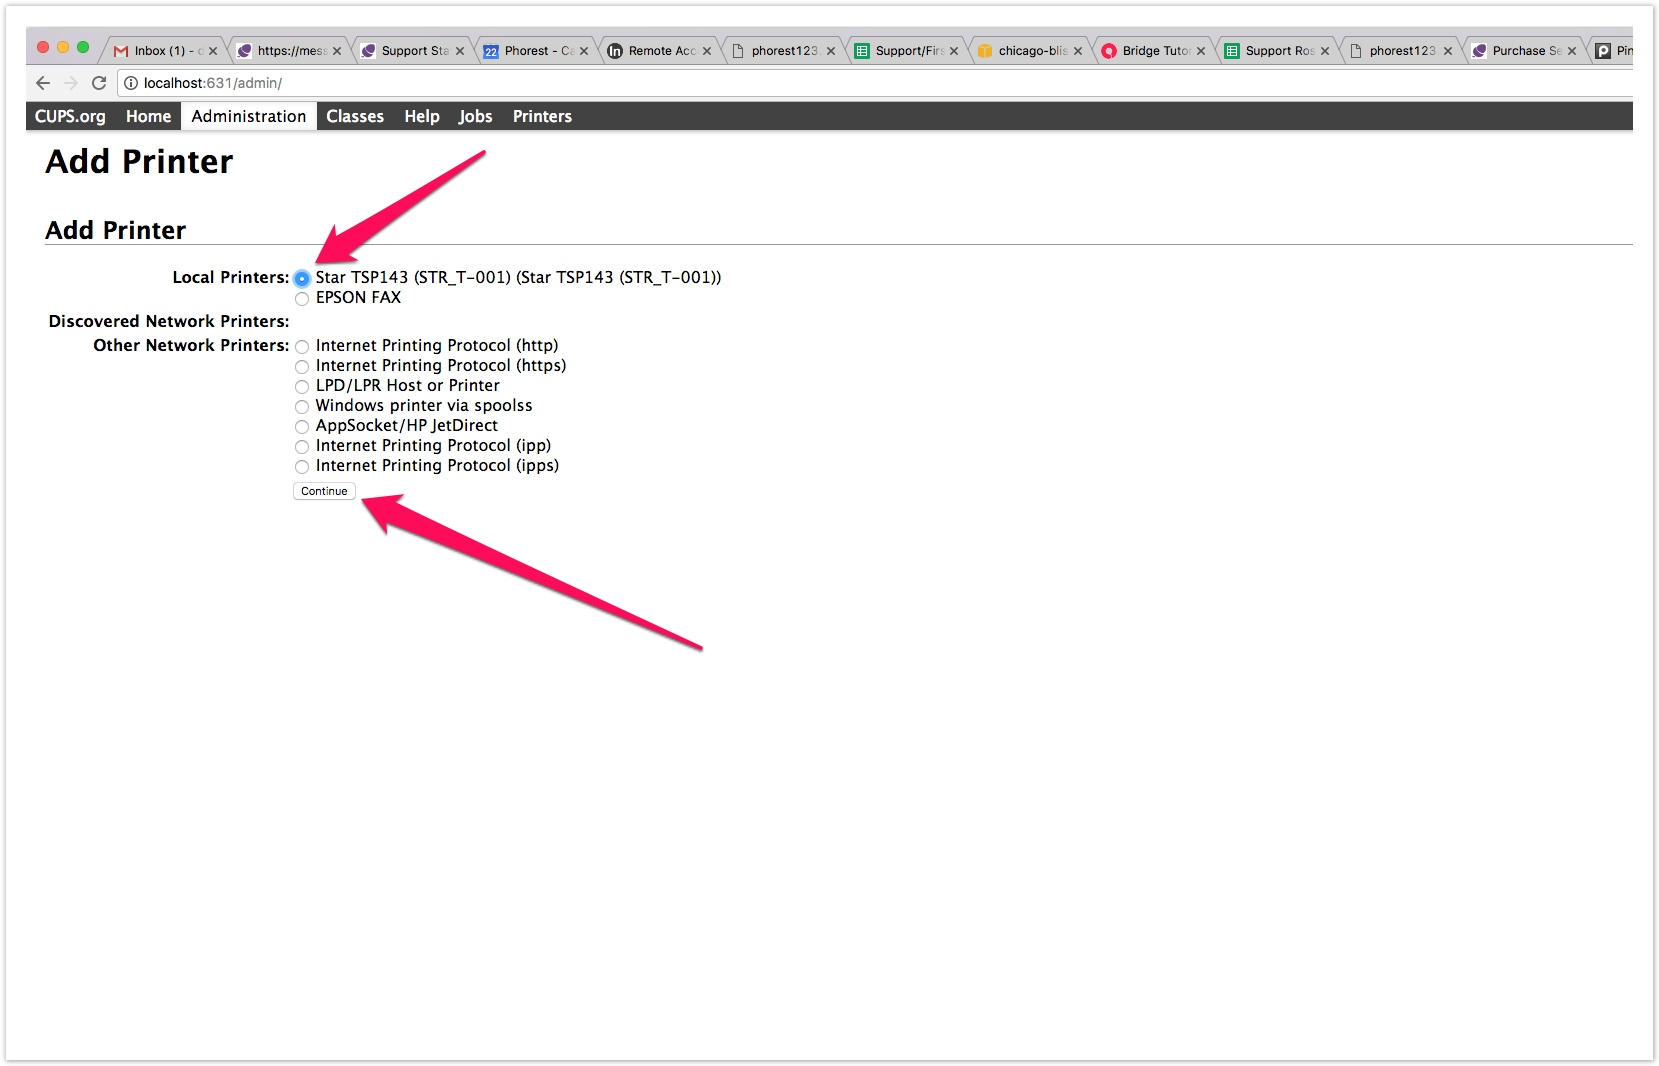
- Choose the receipt printer you have installed and click Continue.
- Choose the Model of the receipt printer, for example, StarTSP100.
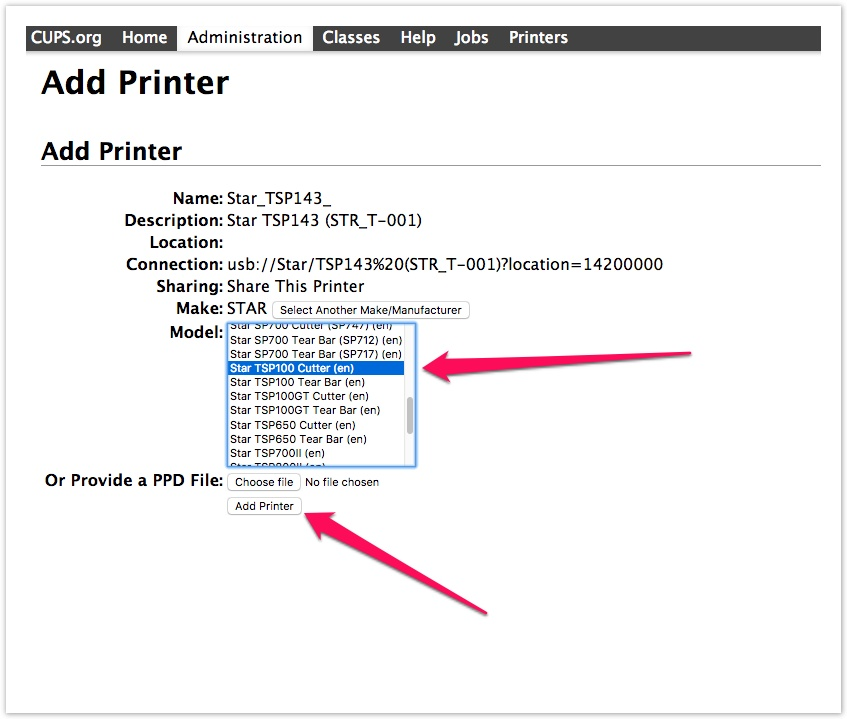
- Click Add Printer
- Select the printer and click Set Default Options and ensure the media size is set to 72mm * 200mm